Showing posts with label DIY. Show all posts

more Market sneek peeks!

10.10.2013


 Just another day in the life of getting ready for the Market!

project(s) update: wreath with candy-striped plaque

9.26.2013

Upcycled, recycled and reused.


This one is fun!

project(s) update: piano key sunburst mirror

9.24.2013

Remember my sneak peeks of projects in the works? (CLICK HERE if you've forgotten.) That pile of 60+ year old piano keys ....


... a sunburst mirror!


 I hemmed and hawed for months about how to attach the keys and finally just tried to glue (wood glue) them. And ... it didn't work so well, so I ended up just nailing them straight through with 1-1/4" nails. I may go back and add a third nail to each key, but I was finished for the day and wanted to see how it would look.


 Kind of amazing! At least this one (if not two) will be for sale at the Market - coming up October 25 26th. And if they don't sell, I'm putting it right back up on the wall here. It's sorta retro, sorta artsy. I love it!

(and did you know? each piano key is numbered ... I used numbers 1-22 on this one)

projects update: entry table makeover

9.23.2013

After being quite unhappy with a recent priming then painting job, I asked around for make-your-own chalk paint recipe and (after sanding) tried it out on this table! I got a free 7.5oz Valspar sample from Lowe's in Mountain Smoke (or a beige gray ..."greige" to be exact) and knew it was for this thrifted table.


It needed some love. So I sanded the heck out of it (probably 5-6 hours worth with all those little details!) and then painted it with THIS chalk paint recipe. And here it is!


I love the details! The weird spiral spot on top (see original pic) actually needs a little more work (a.k.a more sanding) but I'm hoping to sand and repaint that small spot and then clear wax the whole thing.

What do you think??

project(s) update: fence wood *LOVE* sign

9.19.2013

I'll be sharing some projects with you for next couple of weeks - I'm in full gear attempting to crank out projects right and left.

Hope you see something you like!!


materials used: reclaimed fence wood, annie sloan chalk paint in old white, cream muslin and hot glue for rosettes 

Love sign tutorial HERE.

autumn ready: faux leaf fall banner

9.16.2013

boy howdy honey, fall better get here! it's been 100 degrees and i have about had it. the bugs and humidity and heat all need to melt away into gorgeous, breezy days full of autumn color.

i've been readying myself for fall. a friend (thanks Val!) gave me some apples like last year - an almost overflowing copy paper boxful! - and I've been peeling, slicing, mashing and inhaling heavenly scents these days.

there were only two in the whole box that were supermarket-worthy and I loved that! they were oddly-shaped, but organic, healthy and free! besides, why does fruit need to be uniform? i think the variations are gorgeous. but, I digress.

I've also put out - all four of - my fall decorations to let the world and weather know that I. Am. Ready. 
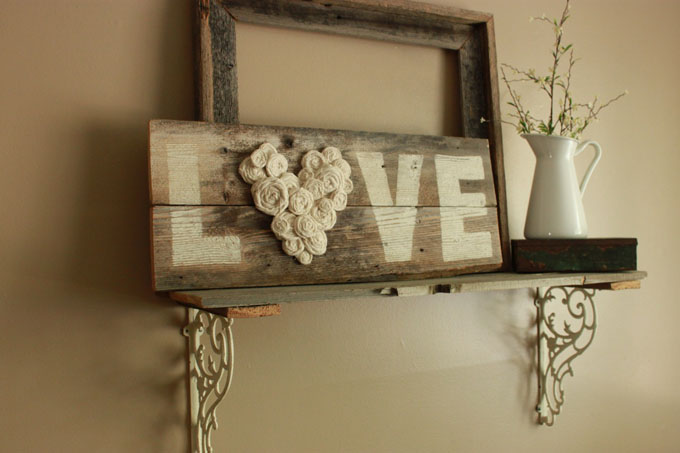
(I'd also love a good, spicy fall candle. Any recommendations?) I came across some faux fall leaves from last year and decided to autumn-ify my living room shelf - it's kind of like my mantle, you know, changing with the seasons.

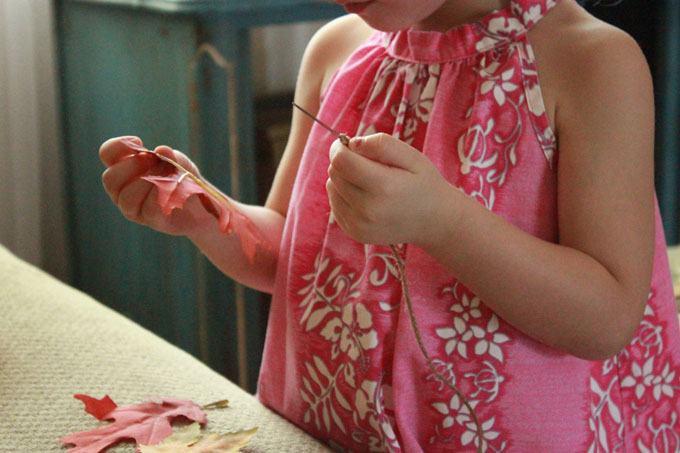
And this was an excellent project for {Ladybug} to be involved in! She did great and took it so seriously. Can you tell?

supplies needed: faux leaves, twine, tapestry (blunt) needle, hole punch, scissors and thumb tacks. 

Just punch, thread and hang! I punched several leaves at a time because they were so thin - it worked much better that way.


(Someone was excited!) I hung the twine on the back of my barnwood frame between thumb tacks. Fluff leaves until you're happy.

And voila! Fall. What do you think?

A perfect toddler activity! (As long as she is careful with the needle, of course.)


"EAT" sign - DIY distressed kitchen sign

9.11.2013


I had a hankering for a new little sign in the kitchen - and it came to me one day. So I used a piece of scrap wood (leftover from THIS project) - then stained it, painted it with Annie Sloan chalk paint and distressed using sand paper and the vaseline distressing trick (see it HERE). I used graphite paper to trace a really simple font and painted it with black acrylic.


it is now perched over my kitchen sick (where there is little else to look at) flanked by two happy green/red/yellow vintage potholders.

40th anniversary *established sign*

9.10.2013

I know, I know, another one.

Ha! I can't help myself. This one was already in the works (in my head) when it was requested. How could I refuse?!

(See my other ones here and here.)


Supplies used: Dark Walnut stain, white and dark blue acrylic artist paint, clear furniture wax, 2 D-rings.

* a CHEERIOS birthday party *

8.29.2013

My sister and brother-in-law threw a fantastic party for their new one-year-old last weekend. (My baby nephew is one!?!) It was way too fun not to share.


They hunted all around for just the right touches - yellow ribbon with white polka dots, napkins, etc. Above: a cheerio box banner, cheerio hearts (strung on pipe cleaners) and also strung cheerios for a table swag.


Above: Asa's SMASH CAKE! (see recipe below). 


Cake (and cupcake) recipe found HERE! (She subbed half the veggie oil for applesauce.)
Topped with a yummy buttercream frosting:
1/2 c crisco
1/2 c butter
5 c powdered sugar
2 Tbsp. milk
1 tsp. vanilla 


Punch (found on Pinterest):
1 c. lemonade mix (like country time)
2 c. water
46 oz pineapple juice
24 oz Sprite

She said, "We froze ice cubes of the lemonade and pineapple juice to keep it cool and cut lemons for decoration. It got so many compliments!"


Above: the birthday boy cheesin' it! And with Mimi and Papa, there to celebrate.


My brother-in-law (a.k.a. the amazing spray painter, painter and artist) spent some time making this photo prop - hand-drawn and painted on yellow foam board.


And they used the heart cut-out as the "guest book". Talk about using what you have!


They also put together a banner of pictures from months 1-11 with "cheerio" like labels for the month numbers. So cute!


We love you Asa!! Happy birthday!

Theme colors: red, yellow
Food shown: cupcakes, chocolate covered cheerio bars, cheerio/white chocolate covered pretzel/M&M mix, lemonade/pineapple punch
Decor: red, yellow and white polka dot balloons, cheerio box pennant banner, cheerio hearts from pipe cleaners, and a cheerio table swag.